Monday, July 30, 2018

Week 4

BSc Creative Computing Project - NWC605COM
WEEK 4:
30th JUL - 5th AUG 2018

First to start of the week I am going to begin creating the body of the model. Before I do anything I need to make sure that import my image plane, as this is what I'm going to use to reference for my full body. Once this is done I can then add a polycylinder and give it 12 subdivisions axes and 4 subdivisions for the height as this will give me something to work with and manipulate. Next I shape the torso to match my reference. 


Afterwards created another poly cylinder and gave it subdivisions axes and 6 subdivisions on the height and lastly I duplicated that poly cylinder as I will be modelling it for the leg of the model also. Then I just move the rows of the poly-cylinder so that it matches image planes using the scale tool. I was very important to make sure that when I was moving the rows at the front that the back was also doing the same. This because it just kinda makes things easier for myself for once.

Despite this I still got annoyed with the software because when I was modelling the face... I feel its different as I get a lot more frustrated when when I selected components and found out that I selected components that I had no intention whatsoever to select e.g. vertices, edges or faces etc. that are hidden behind my current view. Moving the components that were unknowingly selected was highly annoying as there would be multiple times where I would be adjusting one side of the components, then I would rotate round to the other side only to discover that I had disfigured and messed it up that area when previously working on the arms and legs. It is so stressful because whilst I thought that what I’m doing is correct it is not, and the model doesn't match up with my reference (HIGHLY ANNOYING).

I encountered a problem where when I was modelling it was irritating when I went to select a group of faces, I would alter that section and then rotate the model round to the other side only to find out that the model was disfigured. Despite this I managed to overcome this problem, one of the ways that I managed to overcome this problem as there was an option that I could select so that it would select the faces behind what it was that I selected called 'turn off backface culling'.

Monday, July 23, 2018

Week 3:

BSc Creative Computing Project - NWC605COM
WEEK 3 :
23rd JUL 2018

I can now to actually begin to connect the features together. Using the bridge tool I can select the faces below the eye and scale the downwards. 


Afterwards I extrude the edges downwards to create the cheek. Adding subdivisions within those faces allows me to create the shape of the cheek. 
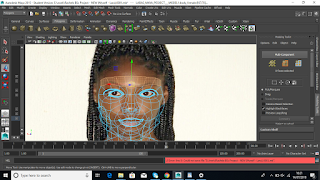
 In addition to this I also select the faces on top of the eye region and extrude them upwards so I can no go about creating the outline of the head. In order to help build the face I select the faces under the chin and extrude then downwards creating some depth to the face. Then I fill in the rest of the faces (anywhere that needs to be filled in the face region) and then adjust the faces so that its mimicking the reference image like seen in the pictures below.


Creating the ears is always tricky to be honest. My method of making the creation of the ear is to first  I insert a poly-cylinder and delete the back faces so you have something to work with. Even though I have no side reference I can still create an ear nonetheless, I just need to continue to rotating the model round to see the side view of what it is that I am creating. Also anther thing that helps is that not working in 'object mode' because this way you will not be able to see the back faces so its best to work in the vertex mode where you can see what it is you're altering. Then lastly extruding the back faces of the ear to create some depth and then once one side is done use duplicate special to replicate it to the other side, like I did before with the arm and leg.


Creating the nostril by Grabbing those faces and pushing them backwards is what creates the nostrils and then connecting them together again to so they are combined doing this creates depth or to get this you could just use bevel on the inner face and extrude the faces upwards.


Monday, July 9, 2018

Week 2:

BSc Creative Computing Project - NWC605COM
WEEK 2:
9th - 14th JUL 2018

At the at the start the week I was majorly ill, where I even had to call off sick for work from Monday to Saturday. However on the Saturday I was starting to feel a lot better so I continued on with my work throughout the weekend. I began by working on the mouth and eyes and making sure that the pieces I created matched my reference. 


I inserted a poly cylinder for the creation of the nose and started to shape it to its anatomy.


Once this was done I created the nose before then doing the exact same thing that I did to the eyes and mouth. Now I've completed the shaping of the features I used the extrude tool. The reason as to why this came in handy and why I used it, is that it allows me to expand on the faces that is already been made allowing me to create more shape and anatomy.


Using the extrude faces allows me to drag top faces upwards so that I can create some shape. By doing this I learnt that its really good to use this tool to help help expand shapes when needed. I also extruded the side of the models face outwards ans began to shape it so that it matched the side of my face. I also attempted to make ears for my self following the same process as as the head modelling which was okay but its some thing that can be improved. 

As you can see below I have managed to create the head using a number of tools in order to create the shape your seeing. Firstly I have used the sculpt tool connect & bridge tool to be able to connect the different faces that needs to be joint together so that the correct shape can be made. 


Here I spend my time just making sure that I am happy with the topology and making sure that everything is neat and tidy.


Lastly I started to work on the side profile as well as the front view. I previously had image planes in but I took them out to create the head of the model as I found it was easier.  I created the skull for the model by adding a polysphere and setting the subdivisions on the axis to 12 & 8 on the height to get started then I worked around the face I had already created in order to blend the faces together by connecting the faces together.

Week 6:

BSc Creative Computing Project - NWC605COM
WEEK : 5
9th AUG 2018

Unfortunately for me this week has not started off to a very good week. At the beginning of the week I did learn that very very close family friend of me and my family passed away suddenly.

Due to this happening to be honest I really haven’t been able to start my work this week like I have not got a clear mind at this current time. I feel like I will be able to work out with a bit of a break just for myself. 

Even though I’m supposed be working through this project all summer I’m also going away on holiday on the 14th for one week...when I heard this news I really really didn’t feel like going but I feel like it’s something I need as of this moment ..so therefore I’m going to take this little mini break and take a trip and I spend some time with my family I’m plus I have to go because the tickets are non-refundable so that be a waste to not go there already booked. 

I know that I just need a little break and when I get back I will have a car and just get what I need today done.

Friday, July 6, 2018

Week 1:

BSc Creative Computing Project - NWC605COM
WEEK 1:
SAT 6th JUL 2018

In this Unit NWC605COM, I am to create my own project. I came up with three initial ideas. The three initial ideas that I had come up with are listed below.

1.Maya model/Scene
2.2D game
5.Create a self driving car or robot using a raspberry pi

The final project that I chose is to design and create my own maya model with scenery within a scene using the software Maya. Before choosing to create a maya model and a scenery for my final project.

As I want to I want to continue to perfect my craft in terms of improving my skills regarding 3D modelling. The main aim and purpose of this project is mainly for my own personal use, as I plan to use this opportunity to produce a piece of work that I can use and put in my portfolio, which I can build up . Once I place my work in my portfolio, this means I can use it when I apply for jobs after when I finish studying for my degree, since I will have something to show that I have created as some sort of evidence.

As previously stated what the main purpose of my project is, it only makes sense that myself and the  would have to say that the target audience for my project is myself as I will need to be happy with what work I am putting out to the employers. However the employers are also my main focus and target audience. This is because they are the individuals who I aim to impress when I show my work.


---------------------------------------------------------------------------------------------------

Everything to do with maya model That I create will be documented within this blog along with screenshots as evidence to show you how I made my model. Firstly I created my project, within maya by creating a new project by going to file<project window < new and then I name my project ‘Rachel’s BSc’s Project - New (Myself -Lara)’


I took some my own photos with my camera, these photos will be used so that I can use them as a reference for my Maya model as I want to create myself.


 Afterwards I imported my image plane from the menu bar into my project that I'll be using throughout modelling and then began to make my project. I started doing this by inserting a polycylinder and set it to have 8 axis subdivisions to  in order to create an eye and used duplicate special to mirror the other eye using duplicate special.

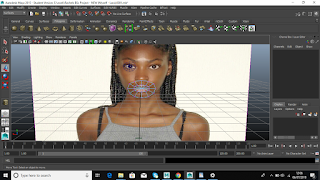
I then inserted another cylinder and set it to have 12 axis subdivisions to create a mouth and place it so that it is centered directly onto of the mouth so that it is aligned with my reference. Whenever I create the polycylinders that I am to used for the creation of the mouth, eyes and nose, I make sure that I get rid of the back faces as most times I don't need them. I was aware that creating the face was going to be a huge task as it always is for me when it comes to maya modelling and potentially the most difficult task to accomplish so I made sure I took my time on this part. Once this was done I added another poly cylinder to the scene, which would be the nose. Where I go on to creating the nose and lips I take the inner subdivision caps before narrowing them to shape the following features then altering the outside subdivision cap. This allows me to create the shapes that I need for what feature it is that I am working on.


I then remove half of the faces of the mouth area. Then I continue to manipulate the shape of the mouth area using the edges & verticles 
 I was able to create some definition within the lips using the multi-cut tool. Before then later shaping the mouth area region. Once this was done I used the scale tool to match the reference of the eye and mouth on the image plane.

 I had to insert another image plane so I could be using that as my reference so I'd have a choice to model from the side profile.

 Then I begin to add some curvature to my lips by using connect components to give my lips the true shape and create a little bit of volume.
I duplicated the eye and created the eyeshape by using the tools to manipulate the shape exactly how I wanted it in order to be aligned with my reference. 


Lastly I focused on getting the correct eye detail and really touching honing down on that.