Monday, August 27, 2018

Week 7:

BSc Creative Computing Project - NWC605COM

WEEK 7: 
27th AUG  - 1st SEPT 2018

I've got quite a bit of time off work this week so I'm trying to get all that I can get done! On tuesday I start to work on my project by beginning adding material to my model however I did take this off after as I didn't think it looked very and was to shiny. I then went on to filling the gap of the crotch area by using my favorite tool the bridge tool. I love it as it makes it a lot easier for people who model join to what it is that the want to connect to wether it be a verticle, edge or faces.

To create the breast I inserted a 'poly-sphere' with a subdivision of the axis 6 and then the height subdivision 4 that has and then I rotate the sphere so that the cap is facing towards me. Shortly I'd then put it where I desire it to be located on the model. Once this is done I create the shape of the breast for it to be however I want it. I then extrude the inner circles inwards for the chest area. I then go on to changing this in my final model as they don't follow that shape. The reason for this is if I kept it like that they wouldn't be true to size and I want them to look realistic as its me being referenced.


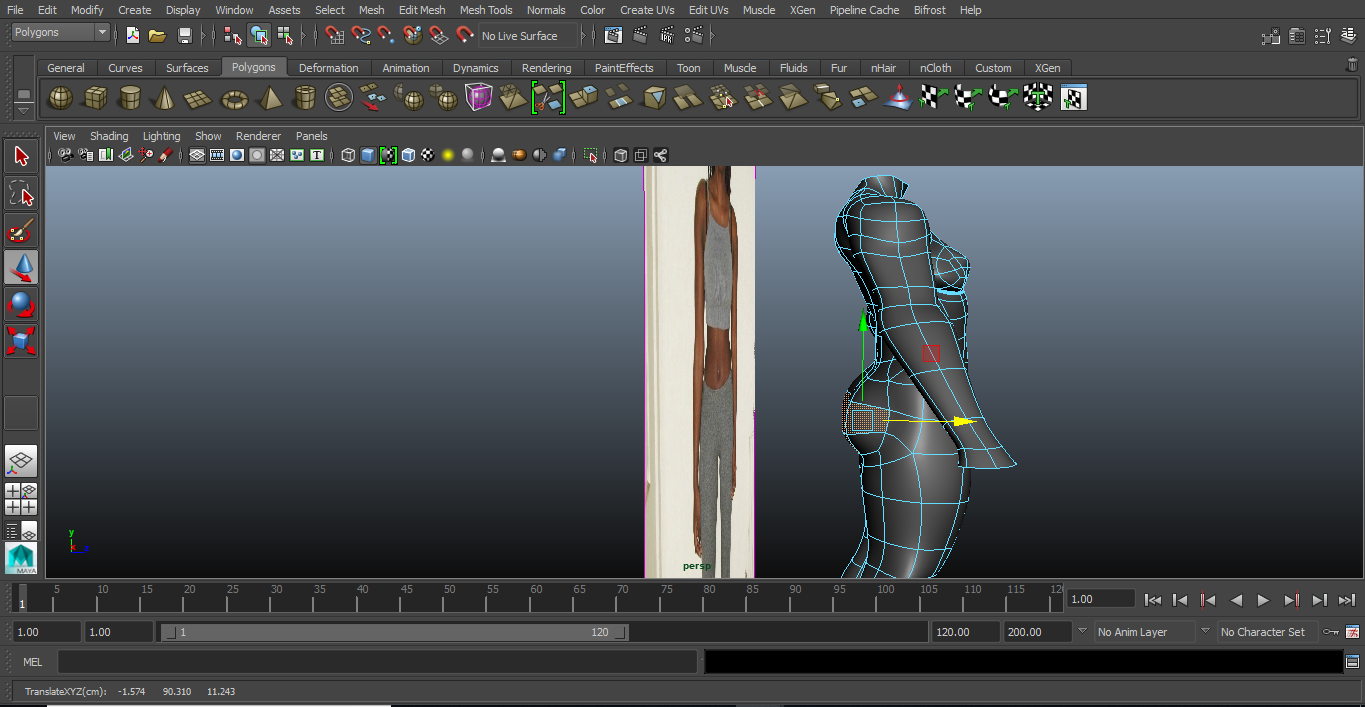
 I then rotate the model round as it has no bum due to faces being accidentally deleted and just my luck maya is set up so that it limits what it can 'undo'. So before I even know the faces are gone I cant do anything about. Therefore unfortunately I have to use my own knowledge when it comes to modelling as I didn't take any side profile pictures to use as my reference. To fix this problem I rotate the model round using the rotate tool and make sure that it's back to front so I can see what I am working with. Now I can proceed to using the connect tool to connect the faces together. Once this is done I then scaled it outwards to create the bum as well as give it shape.


Creating the hands and fingers is sometimes tricky, In order to create the hands and the fingers I had to create new faces and build them from scratch by connecting the faces and extruding them from the hand in order to create the fingers. I also shape the fingers by smoothing them so they are less harsh. Then I adjusting the length of the fingers. I don’t make the fingers that long as I have quite small hands in general. Also the length of the fingers are different as they aren’t all the same length on one hand.


Similar to the hands I will be also be creating the feet with the same method starting with the base of the foot and extruding it out words and using the edge loop tool to create edges so I'll be able to manipulate them. I do this whilst the faces are smoothed. The only bad thing about this is that. In order to create the hands and the fingers I had to create new faces and build them from scratch by connecting the faces and extruding them from the hand in order to create the fingers. I also shape the fingers by smoothing them so they are less harsh. Then I adjusting the length of the fingers. I don’t make the fingers that long as I have quite small hands in general. Also the length of the fingers are different as they aren’t all the same length on one hand.


Here is the final maya model that I created using my image planes.

Final Model:


Monday, August 6, 2018

Week 5:

BSc Creative Computing Project - NWC605COM
WEEK : 5
6th AUG 2018

Now that I'm working and all I must admit as I'm working through out the summer its not the easiest to do this project and work full-time at the same time as my job is quite demanding. However as the week approaches I make sure I find time to do some work especially now im off for the next two days and as I want to also make the most of my summer I'm working towards finishing this project. When I'm not working in my spare time I will be working on my maya project as it has to be in for September which is close.


So its now Tuesday and I'm going to start by extruding the neck upwards. Moving on to the neck I selected the 8 faces at the top of the poly-cylinder and began to extrude it inwards so that it resembled a neck. I made sure that it was later lined up with the reference before I extruded the neck more upwards even further.


Using the edge rings that I have create I will use them so that I will be able to to position it so that they match my reference and that it is also aligned properly, and then rotate it so that it is still matching my reference. Using the key tool the scale tool to match the image reference in order to add some volume to the model. Even though in the image plane I am standing with my hands besides my body ..I prefer when my models to have the arms sticking out, as I feel like it gives them more character so, later on during the creation of my model I shall be changing the original position so the arms will be sticking out.


Using the exact same process as I used when I came to shaping the arms I will also use it to shape the legs using the edge rings, edges and verts. I will use them to position the rows/edge so that they match my reference and that it is also aligned properly, and then when I get to the bottom of the leg I will extrude the bottom of the leg down, in order to be able to create the base of the foot as well as the ankle. The last image is to show the overall edited leg. As you can see my hips are quite wide so I will be grabbing the side faces and pulling them out so they match my hips like so in the image.


Deleting the top faces of the torso as well as the side of the torso, the arms and legs. I do this simply because I then makes it easier for me to join the body parts together, which can be done using the combine and or either the bridge tool
as well as the bottom


Once this is done I then go about duplicating the arm and leg to the other side and their is a special way I do this. I begin as I use a tool called duplicate special tool and then change the 'x scale' to -1.0000, so that it will automatically duplicate to the other side with out any trouble and there is a plus to doing this as it is duplicates the body parts symmetrically. Once I've done this I need to change the viewpoint so the mesh of the body wont be black.


Like previously mention I have stuck out the models arms before I going to connect the are to the shoulders.